Full Virtual Machine
Table of Contents
- [Introduction](#introduction)
- [Deployment](#deployment)
- [Difference Between Full VM and Micro VM](#difference-between-full-vm-and-micro-vm)
- [Manually Mounting Additional Disk](#manually-mounting-additional-disk)
- [Check All Disks Attached to the VM](#check-all-disks-attached-to-the-vm)
- [Create a Mount Directory](#create-a-mount-directory)
- [New file system](#new-file-system)
- [Mount drive](#mount-drive)
***
## Introduction
We present the steps to deploy a full VM on the TFGrid.
## Deployment
Deploy a new full virtual machine on the Threefold Grid
- Make sure you have a [wallet](../wallet_connector.md)
- From the sidebar click on **Applications**
- Click on **Full Virtual Machine**
**Process:**
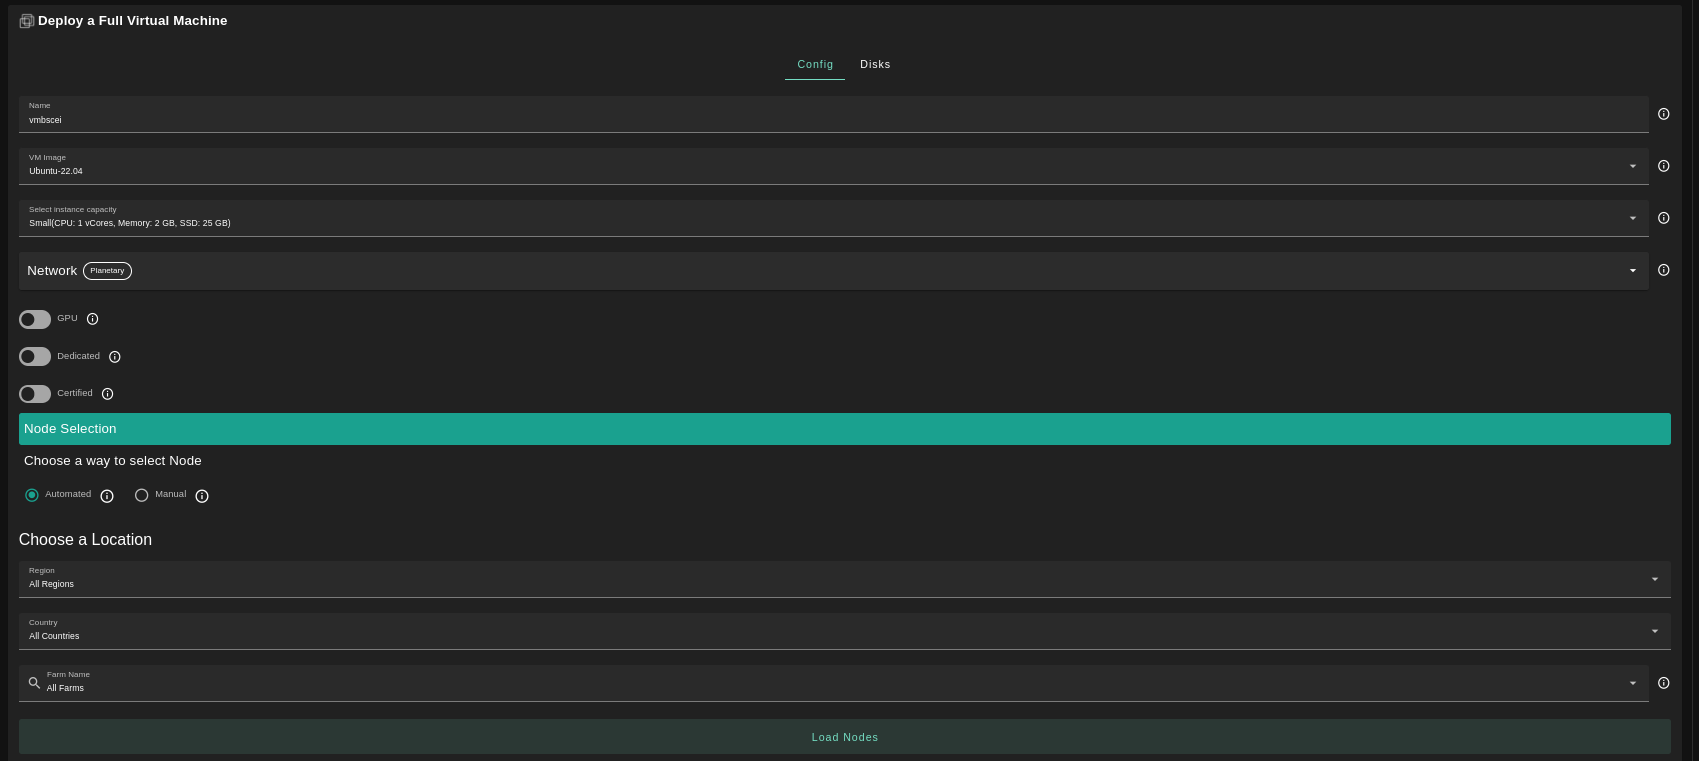
- Fill in the instance name: it's used to reference the Full VM in the future.
- Choose the image from the drop down (e.g Alpine, Ubuntu) or you can click on `Other` and manually specify the flist URL and the entrypoint.
- Select a capacity package:
- **Small**: {cpu: 1, memory: 2, diskSize: 25 }
- **Medium**: {cpu: 2, memory: 4, diskSize: 50 }
- **Large**: {cpu: 4, memory: 16, diskSize: 100}
- Or choose a **Custom** plan
- Choose the network
- `Public IPv4` flag gives the virtual machine a Public IPv4
- `Public IPv6` flag gives the virtual machine a Public IPv6
- `Planetary Network` to connect the Virtual Machine to Planetary network
- `Myceluim` to enable mycelium on the virtual machine
- `Wireguard Access` to add a wireguard access to the Virtual Machine
- `GPU` flag to add GPU to the Virtual machine
- To deploy a Full VM with GPU, you first need to [rent a dedicated node](../../dashboard/deploy/dedicated_machines.md)
- `Dedicated` flag to retrieve only dedicated nodes
- `Certified` flag to retrieve only certified nodes
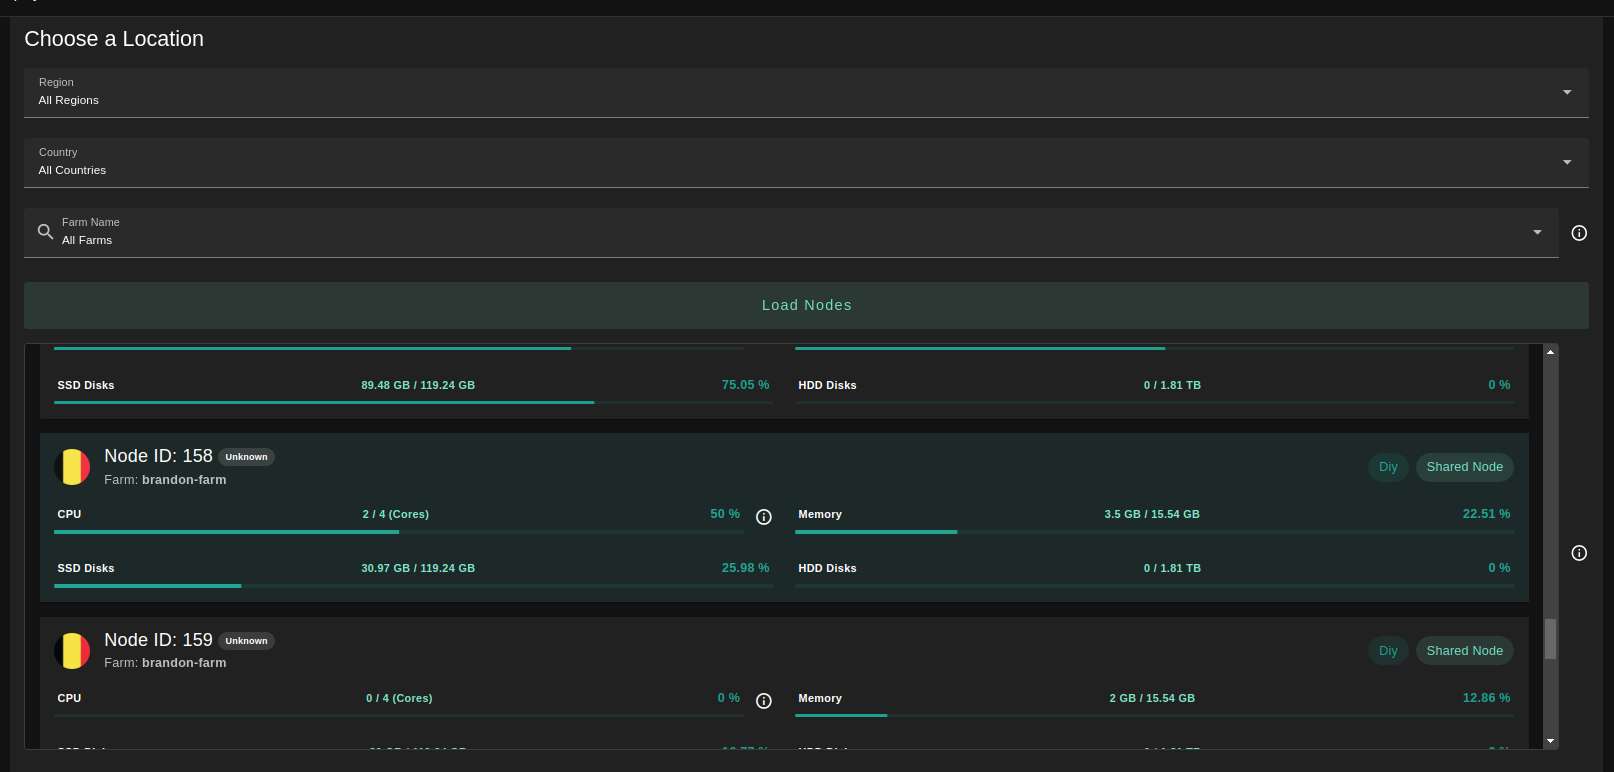
- Choose the location of the node
- `Country`
- `Farm Name`
- Choose the node to deploy the Full Virtual Machine on
You can attach one or more disks to the Virtual Machine by clicking on the Disks tab and the plus `+` sign and specify the following parameters
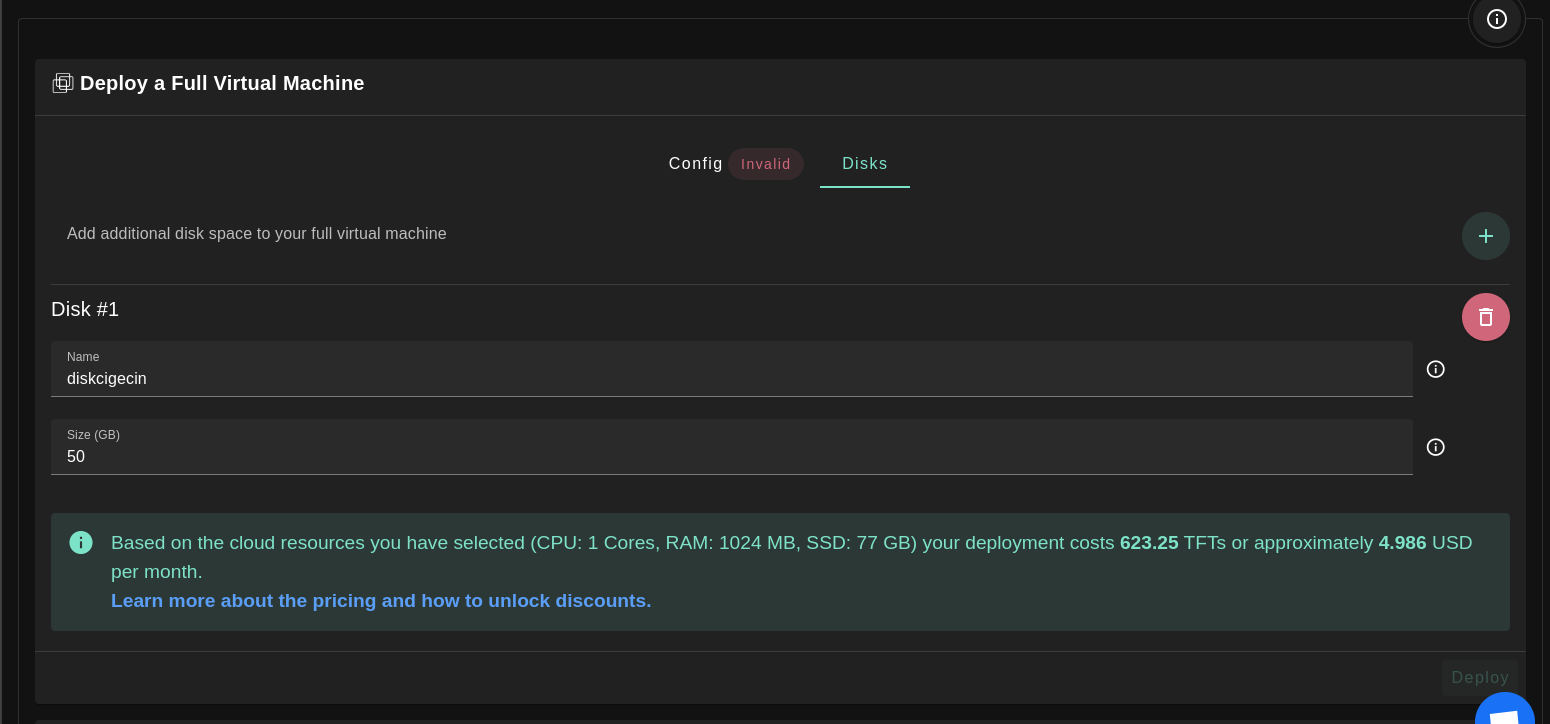
- Disk name
- Disk size
in the bottom of the page you can see a list of all of the virtual machines you deployed. you can click on `Show details` for more details
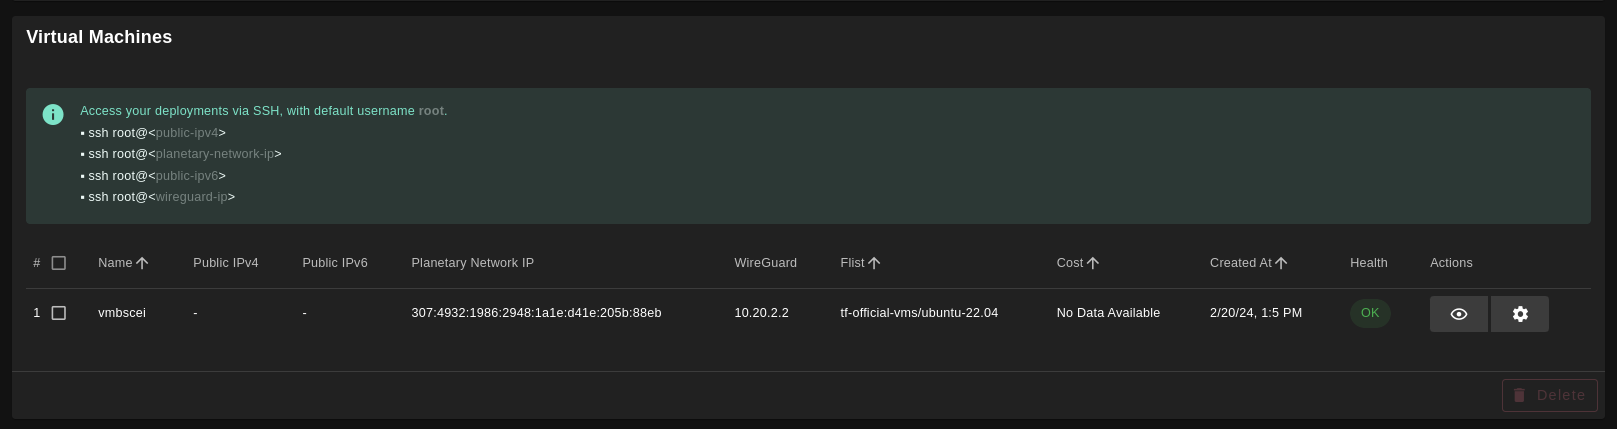
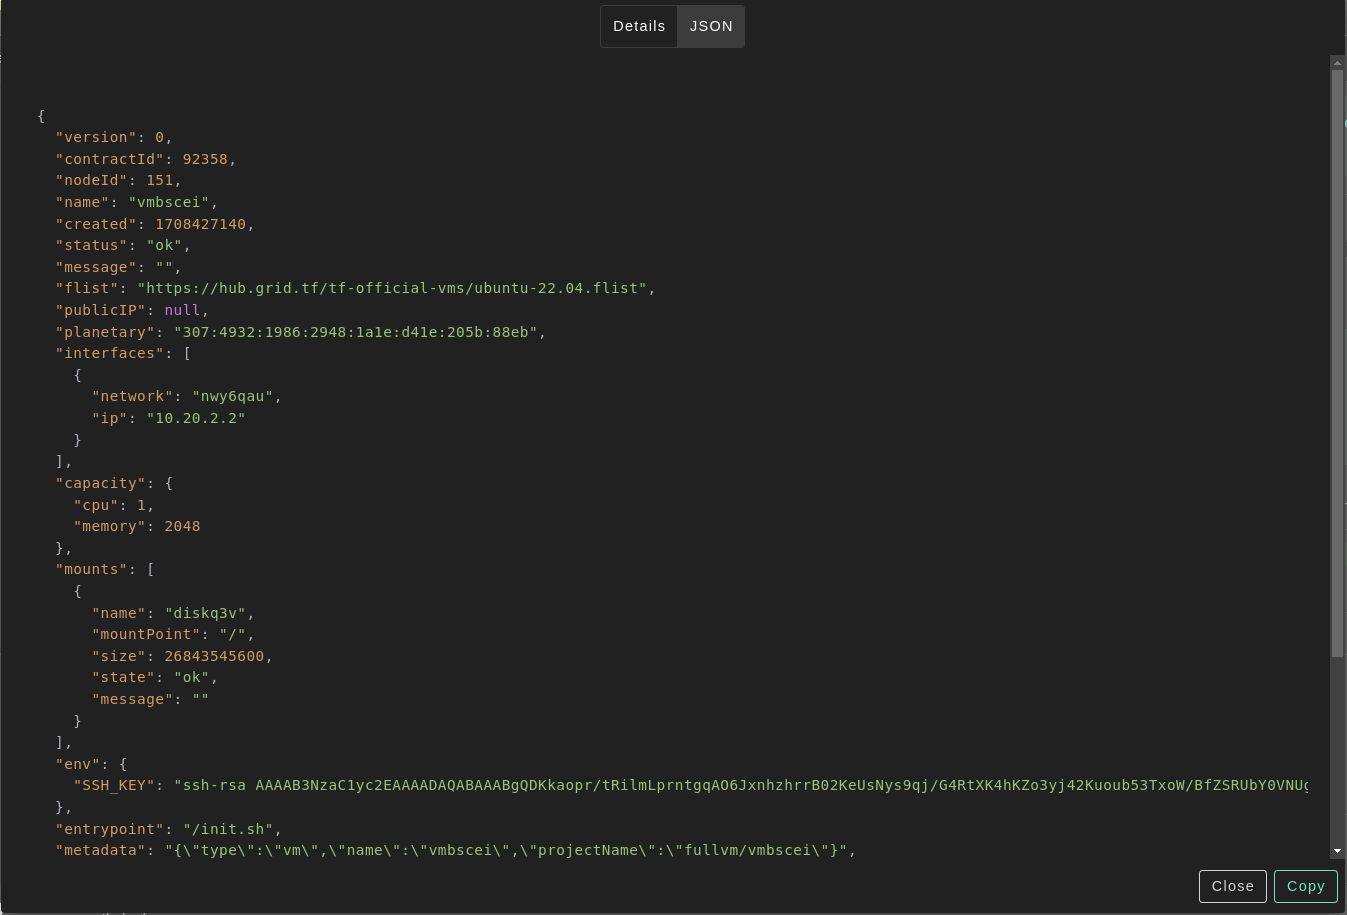
You can also go to JSON tab for full details
## Difference Between Full VM and Micro VM
- Full VM contains a default disk attached to it which is not the case in the Micro VM where you needed to make sure to attach a disk to it or the VM will fail
- The default disk is mounted on / so if you want to attach any additional disks, you have to choose a different mounting point
- Only cloud init flists can be deployed on Full VM. You can check official Threefold flists [here](https://hub.grid.tf/tf-official-vms)
- In Full VM, you need to mount the additional disks manually after the VM is deployed
## Manually Mounting Additional Disk
- You can follow the following commands to add your disk manually:
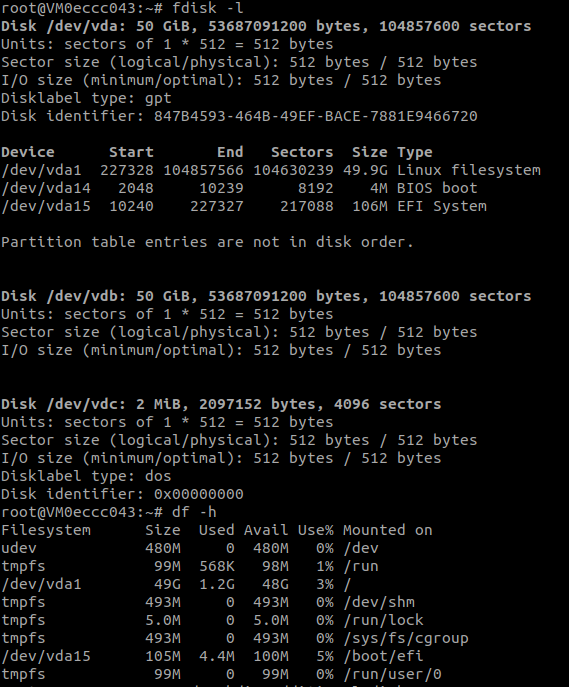
### Check All Disks Attached to the VM
```bash
fdisk -l
```
The additional disk won't be mounted and you won't find it listed
```bash
df -h
```
### Create a Mount Directory
```bash
sudo mkdir /hdd6T
```
### New file system
```bash
sudo mkfs.ext4 /dev/vdb
```
### Mount drive
```bash
sudo mount /dev/vdb /hdd6T/
```