Gitea
Table of Contents
- [Introduction](#introduction)
- [Prerequisites](#prerequisites)
- [Deployment](#deployment)
- [Setting Up Gitea](#setting-up-gitea)
***
## Introduction
[Gitea](https://about.gitea.com/) is a forge software package for hosting software development version control using Git as well as other collaborative features like bug tracking, code review, continuous integration, kanban boards, tickets, and wikis.
## Prerequisites
- Make sure you have a [wallet](wallet_connector.md)
- From the sidebar click on **Applications**
- Click on **Gitea**
## Deployment
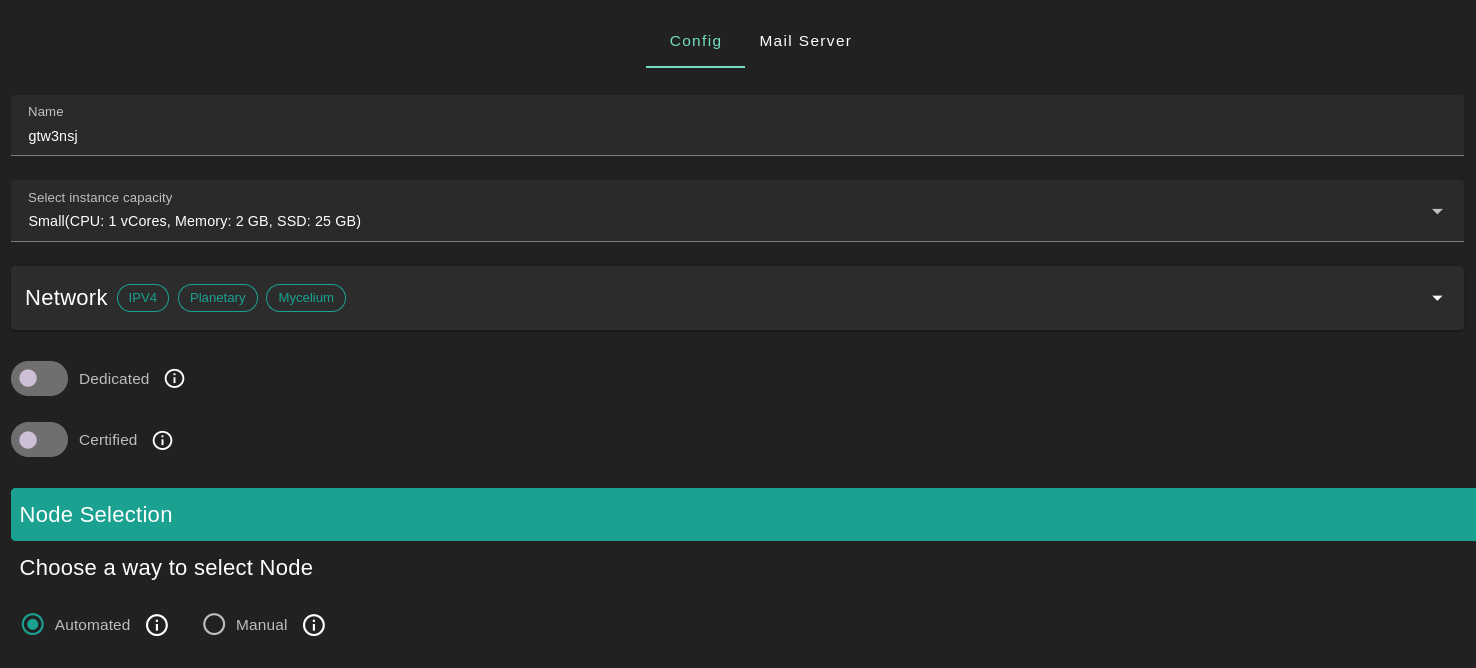
- Enter a name for your deployment or keep the default name
- Select a capacity package:
- **Small**: {cpu: 1, memory: 2, diskSize: 25 }
- **Medium**: {cpu: 2, memory: 4, diskSize: 50 }
- **Large**: {cpu: 4, memory: 16, diskSize: 100 }
- Or choose a **Custom** plan
- Choose the network
- `Public IPv4` flag gives the virtual machine a Public IPv4
- `Public IPv6` flag gives the virtual machine a Public IPv6
- `Planetary Network` flag gives the virtual machine an Yggdrasil address
- `Mycelium` flag gives the virtual machine a Mycelium address
- `Dedicated` flag to retrieve only dedicated nodes
- `Certified` flag to retrieve only certified nodes
- Choose the node
- Automated
- Choose the location of the node
- `Region`
- `Country`
- `Farm Name`
- Click on `Load Nodes`
- Click on the node you want to deploy on
- Manual selection
- Select a specific node ID
- Choose a domain
- Use a custom domain by enabling `Custom Domain`
- Choose a gateway domain for your instance
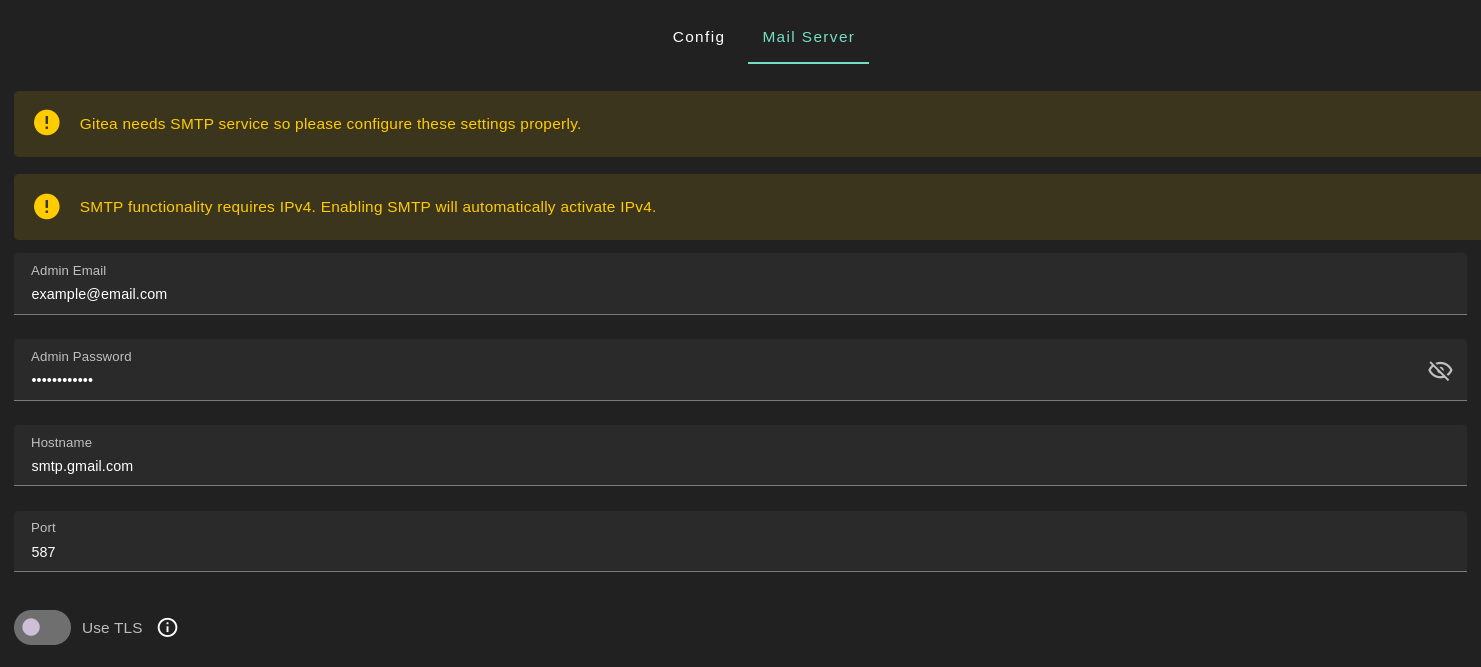
- Set the `Mail Server`
- In the tab `Mail Server` you can adjust the parameters or leave the default parameters
- The `Admin Email` by default is the email you used when logging into the Dashboard
- The `Admin Password` is generated automatically but you can modify it
- By default the SMTP server used for the `Hostname` is `smtp.gmail.com` with its associated port `587`
- Enable TLS by clicking on the `TLS` button
- Click `Deploy`
After deployment, you can see a list of all your deployed instances.
To access the Gitea instance, click on the `Actions` button called `Visit`.

## Setting Up Gitea
Once you've accessed the Gitea instance, you can adjust the `Initial Configuration` if needed.
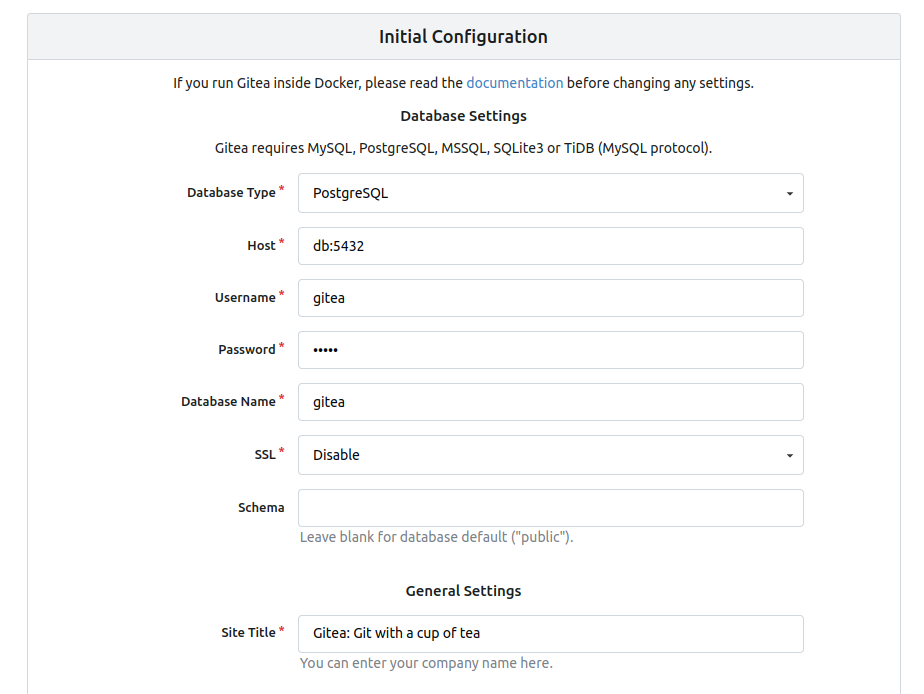
Once you're ready, click on `Install Gitea`.
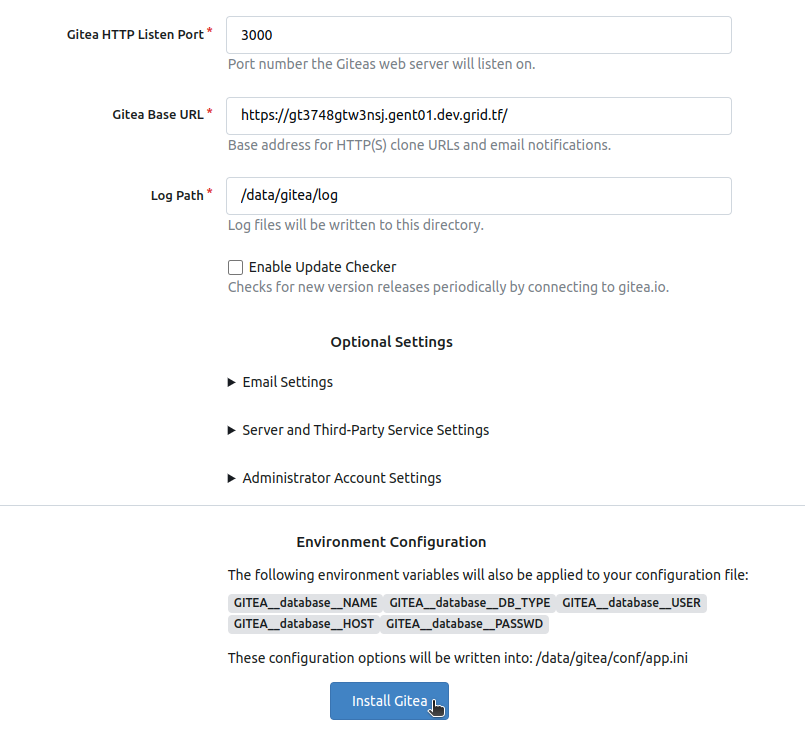
Once the configuration is completed, you can register to the Gitea instance and start using it.
