ownCloud
Table of Contents
- [Introduction](#introduction)
- [Prerequisites](#prerequisites)
- [Deploy ownCloud](#deploy-owncloud)
- [Base](#base)
- [SMTP](#smtp)
- [List of Instances](#list-of-instances)
- [Admin Connection](#admin-connection)
- [TFConnect App Connection](#tfconnect-app-connection)
***
## Introduction
[ownCloud](https://owncloud.com/) develops and provides open-source software for content collaboration, allowing teams to easily share and work on files seamlessly regardless of device or location.
## Prerequisites
- Make sure you have a [wallet](wallet_connector.md)
- From the sidebar click on **Solutions**
- Click on **ownCloud**
## Deploy ownCloud
### Base
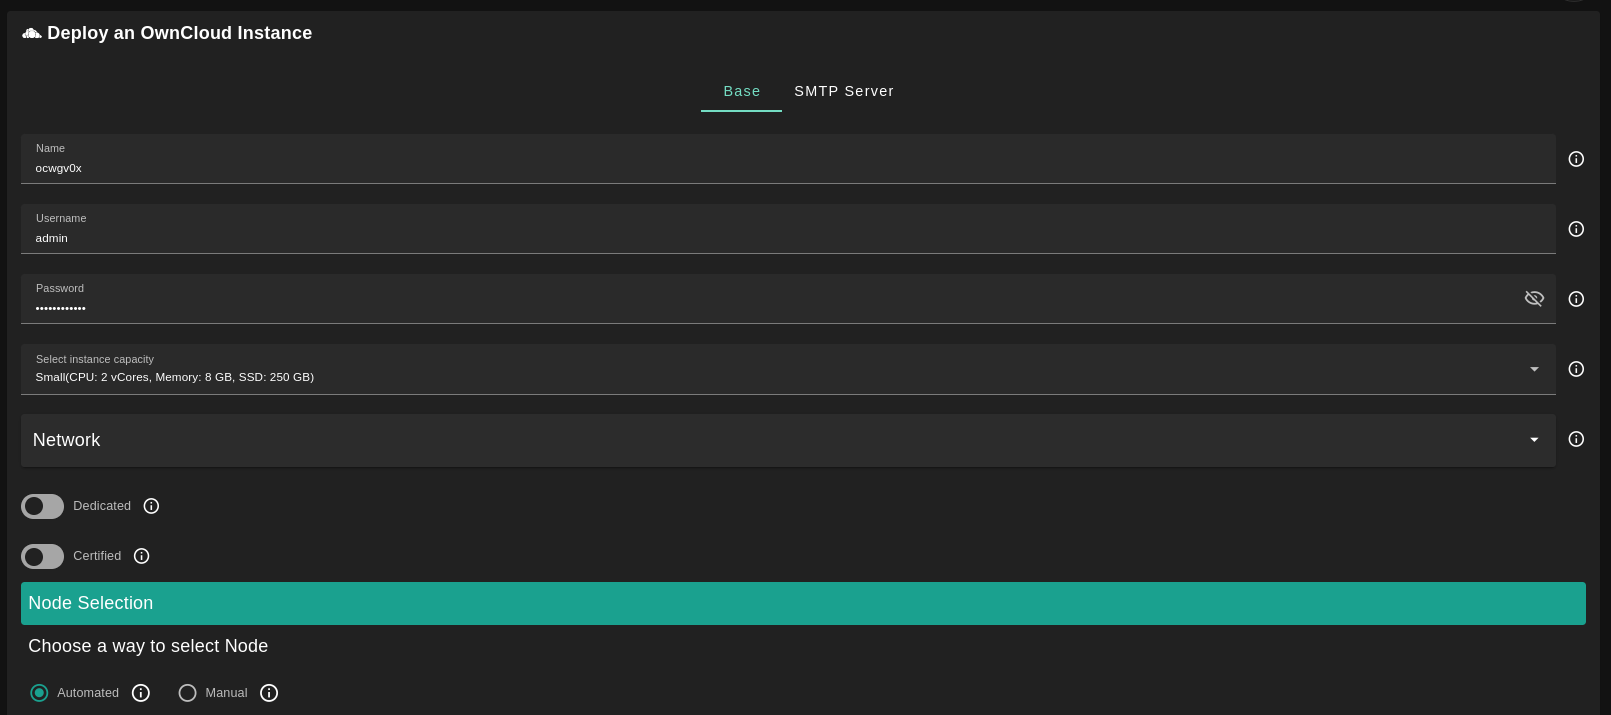
- Enter an ownCloud deployment name.
- The name is used in generating a unique subdomain on one of the gateways on the network alongside your twin ID.
- Ex. ***oc98newcloud*.gent02.dev.grid.tf**
- Enter administrator information including **Username** and **Password**.
- This admin user will have full permission on the deployed instance.
- Select a capacity package:
- **Small**: {cpu: 2, memory: 8, diskSize: 250 }
- **Medium**: {cpu: 2, memory: 16, diskSize: 500 }
- **Large**: {cpu: 4, memory: 32, diskSize: 1000 }
- Or choose a **Custom** plan
- Choose the network
- `Public IPv4` flag gives the virtual machine a Public IPv4
- Enable the `Dedicated` flag to retrieve only dedicated nodes
- Enable the `Certified` flag to retrieve only certified nodes
- Choose the location of the node
- `Region`
- `Country`
- `Farm Name`
- Choose the node to deploy on
> Or you can select a specific node with manual selection.
- Enable the `Custom Domain` flag to use a custom domain
- Choose a gateway node to deploy your ownCloud instance on.
Once you've set the deployment parameters, you can click on **Deploy**.
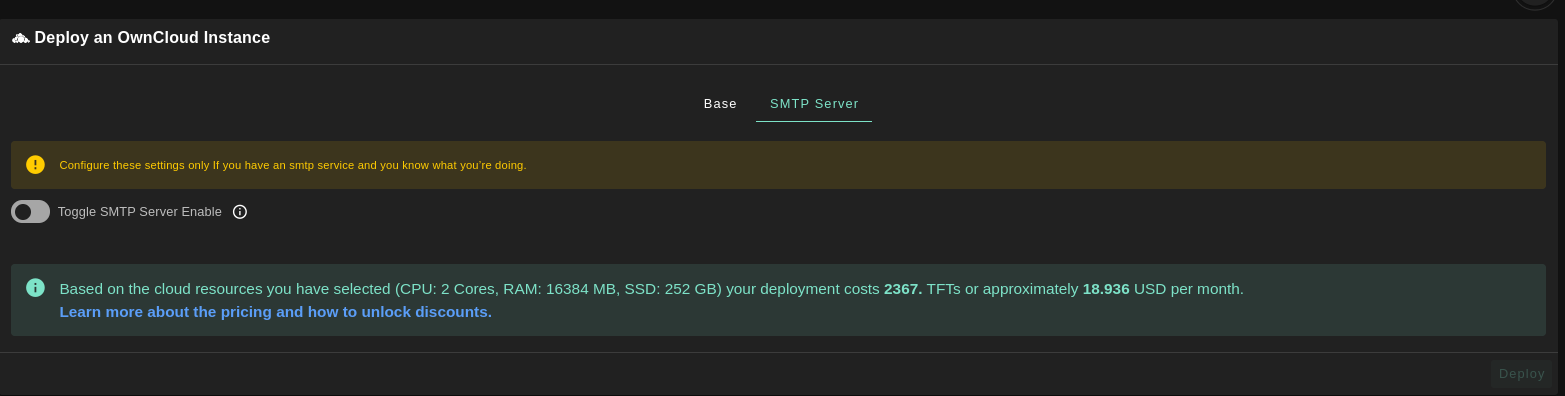
### SMTP
On the SMTP window, you can enable the optional `SMTP Server` flag if you want to have your ownCloud instance configured with an SMTP server.
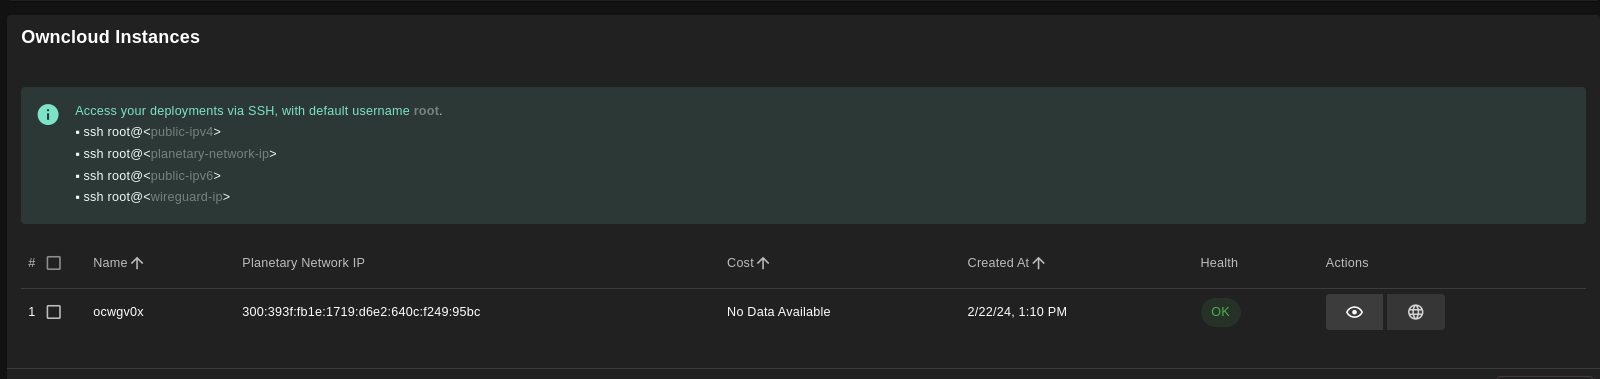
### List of Instances
When the deployment is ready, you will see a list of all of your deployed instances.
## Admin Connection
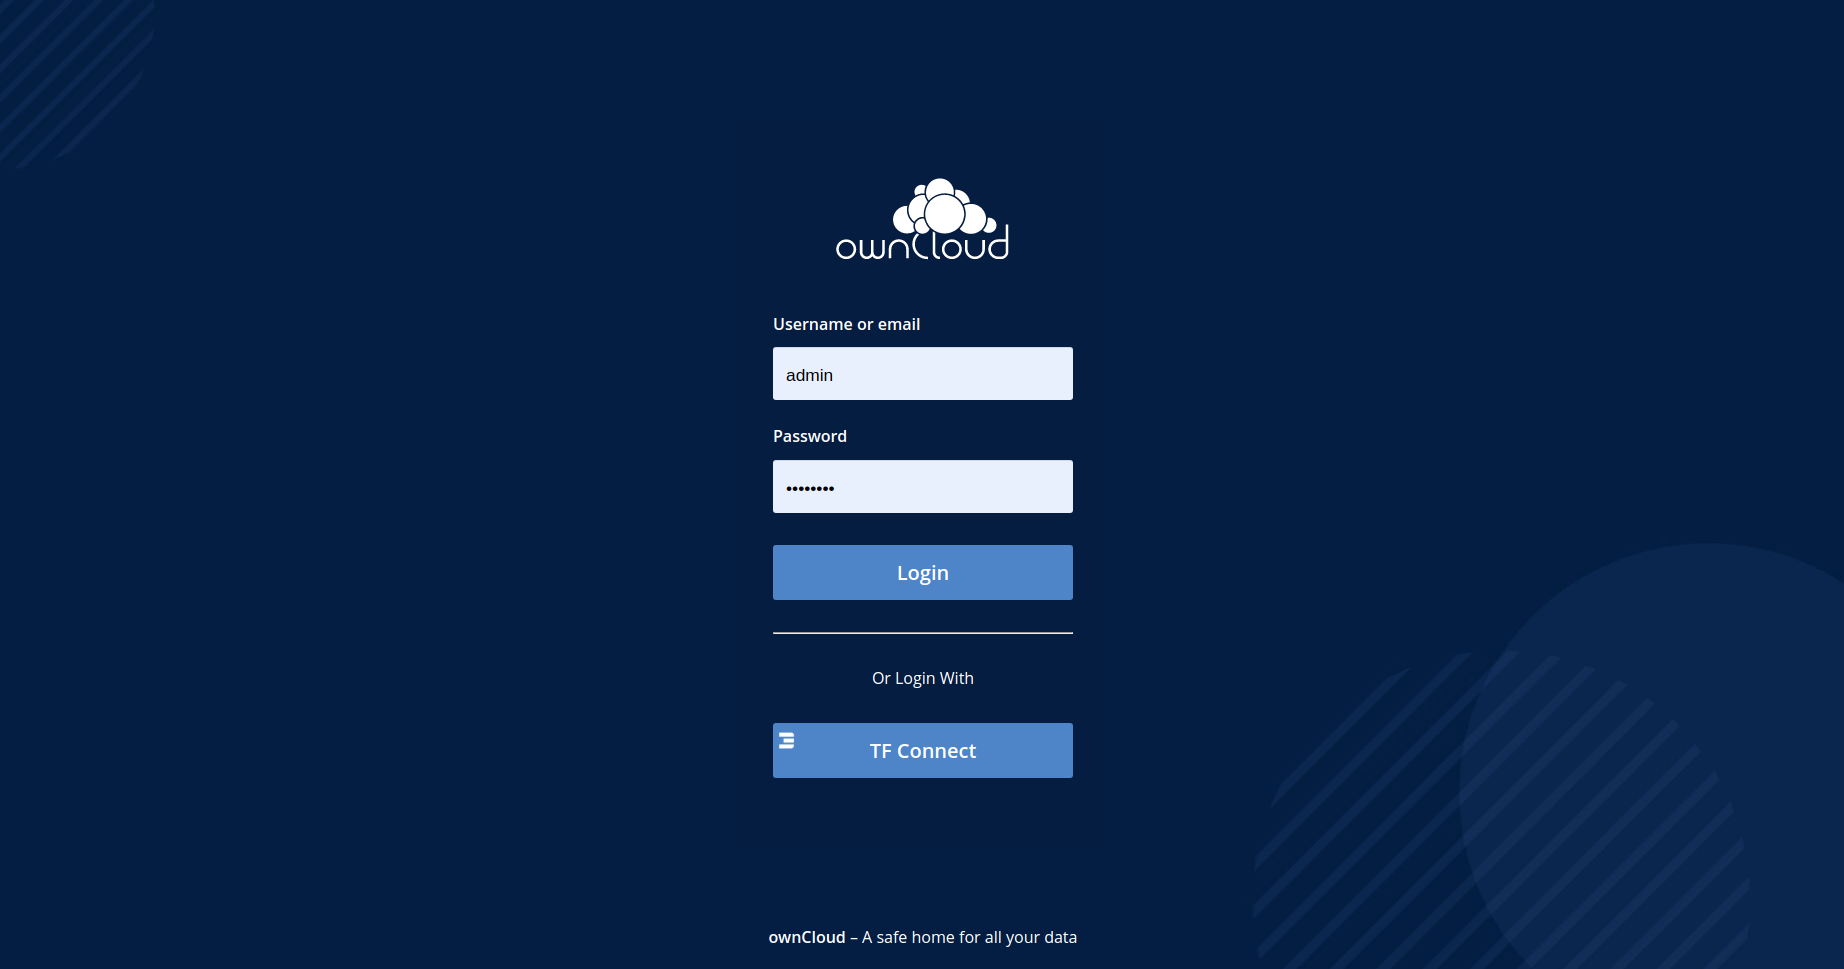
Click on the button **Visit** under **Actions** to open the ownCloud login window. If you see **bad gateway**, you might simply need to wait a couple of minutes until the deployment completes.

To consult the deployment details, click on the button **Details** under **Actions**. On this page, you can access the **ownCloud Admin Username** and the **ownCloud Admin Password**. Use those credentials to log in as an administrator on your ownCloud deployment.
## TFConnect App Connection
To connect to your ownCloud instance with the ThreeFold Connect app, you need to add permissions to your ThreeFold 3Bot ID by first [connecting as an administrator](#admin-connection).
- Once you're connected as an admin, open the top-right menu and click on **Users**.
- To create a new user, set your 3Bot ID as the username with its corresponding email address, and set **Groups** as **admin**. Then click **Create**.
- You can now log out and connect to your ownCloud instance with the TF Connect app.